
Welding is one of the techniques of connecting metals by melting some of the filler metal with or without pressure and with or without a metal enhancer which produces a continuous connection. The scope of the use of welding techniques in construction is comprehensive, including shipping, bridges, steel frames, pressure vessels, fast pipes, pipelines and so on.
Based on the definition of DIN (Deutch Industrie Normen) welds are metallurgical bonds on guide metal joints which are carried out in a melted or liquid state. From this definition, it can be further explained that welding is a local connection of several metal rods using heat energy. At this time, 40 types of welding have been used, including welding, which was carried out on pressing two metals that were joined together so that these two metals could glue together.
The Basic Tools
 Before you start welding, here are the primary tools that you must have in your workshop:
- Welding machines
- AC/DCElectrical Power
- Electrode Holder/electrode pliers/electrode clamp
- Welding cables (electrode cables/mass cables/power cables)
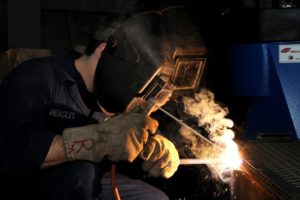
Not only do you need to have the welding machine and all of its supporting accessories, but you also have to wear protective gears during the welding process. Here is a list for you:
- Welding mask, to protect the eyes from the weld beam
- Suction blower, to protect your respiratory organs in case of fire
- Welding apron/chest protector, to protect the body from sparks
- Welding gloves
- Protective shoes
Additional tools:
- Pliers
- Steel brush
- Hammer crust
- Welding table
- Grinding Machine
The Preparation
Clean the material to be welded. Use a hammer to clean the crust on the surface of the area to be welded. Use a steel brush for maximum results. And place the material to be welded in the space provided whether it’s using a work desk or just putting it on the floor. Adjust the density between the two ingredients. And don’t forget to use the clamps if needed.
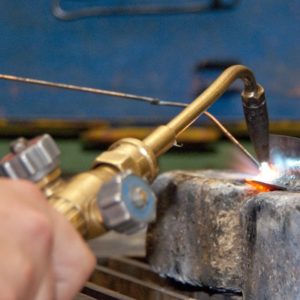
Place the welding machine on one part of the material to be welded. Insert the electrode on the electrode clamp panel on the welding machine. Attach the tilt of the electrode to adjust the position of the material. Usually, there is a special place for the electrode slope on the electrode clamping pliers. Either it’s perpendicular 90 degrees, 30 or 40 degrees. After the material is ready to be welded, slowly bring the electrode tip to the material to be welded.
Tips for the Best Result
 The distance between the tip of the electrode and the material affects the quality of the welding significantly. If the range is too far away, a spark will emerge like a rain of fire spots. The welding process will be imperfect. If the distance is too close, the fire does not flare correctly. And there is not enough distance for the electrode melt. A reasonable length is one-eighth of the thickness of the electrode.
By using a protective mask or welding goggles, you can pay attention to the part of the electrode that has melted together between the two welded materials. Gently move the wire along the welded area.
Good results during the welding process can be seen when the welded surface is shaped like a strong wave and regularly closes the welded part perfectly.
When finished, clean the crust covering the welded part using a hammer. Double-check that there are parts that have not been perfect. If it is not perfect, repeat the part that has not been well united. In some cases, the welded material must be grinding again if the welding is not precise. But if it’s not too fatal, we need to weld the part that isn’t correctly welded.